Contents
A question by MaryLou1955 about swapping a Name with an Alternate Name prompted this look at an easy way to do it, especially for someone new to SQLite. This page starts by showing how one can answer MaryLou’s question by directly editing the RootsMagic database with a SQLite manager without needing to know anything about writing SQL statements. Then it introduces a simple SQLite script that can expedite future edits of the NameTable and introduce you to some very basic SQLite commands and expressions.
While I tend to use SQLiteSpy for most things, I find myself turning to SQLite Expert Personal more frequently than before and this is one of them. While its user interface is a bit more daunting to start with, it has features that ultimately make it more suited to this task – editing a subset of columns from a table. If you do not have it already, visit the page SQLite Managers and follow the links to download SQLite Expert Personal and the associated fake RMNOCASE extension.
Editing RootsMagic Database with no knowledge of SQL
- Start SQLite Expert
- File > Open Database
- Browse to the folder holding the copy of your RootsMagic database (file extension .rmgc and, of course, you made a backup or this is a copy you have renamed)
- Start typing the name of the RM database file in the File name field – a list should drop down. Select the one you want and click Open.
- Right-click on the name of the database that has now appeared in the sidebar and from the drop-down menu select Load Extension. Browse to where you stored unifuzz.dll and select it. OK the default entry point in the pop out window
- Click on the table name “NameTable” listed in the sidebar under the database name and then on the Data tab. The result should be similar to this:

- You can start editing right now but there are some features you should explore to make it easier and safer:
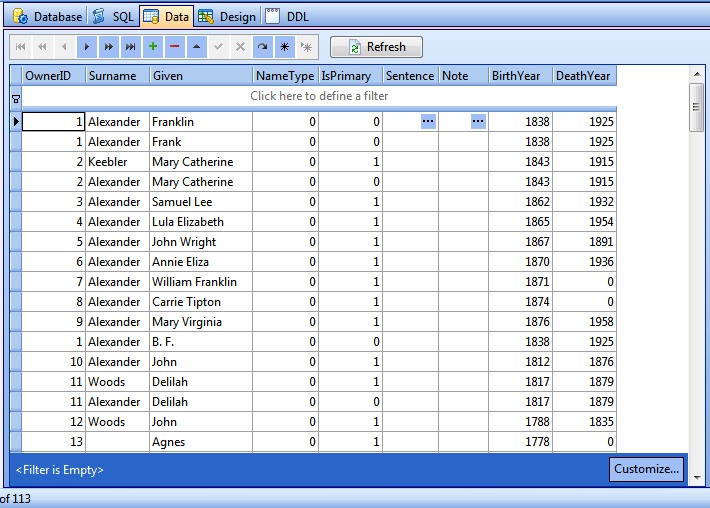
- There are a lot of columns so let’s reduce to the ones we are interested in. Right-click anywhere in the table display and select from the drop-down menu “Select columns”. Uncheck all those that are of no interest and use to your purpose. RecNo is simply the row number of the current result set and has nothing to do with RootsMagic’s Record Number. NameID is not to be touched and is invisible to you in RootsMagic. OwnerID is RootsMagic’s Record Number so check it but do not edit it! After selecting columns, you now have a more compact table to work with as in this screen:

- There’s more: Click on the heading of any column (not on the little funnel icon that will show when the pointer hovers over the header) to sort alternately between ascending and descending on the values in that column.
- And really powerful is that little funnel, the filter row below the headings and the filter row at the bot with the Cusize button. These are three complementary controls for filtering the results of any table or query to those of interest. For a simple example, I want to swap the primary Name and an Alternate Name for the person with RootsMagic RIN of 53. I simply type “53” into the filter row under OwnerID and get this:
 Now we see all of the names for Mary Haws-53 altogether and only her names. The NameType numbers represent Birth (2), Married (5) and Nickname (6). The IsPrimary number {1,0} is a True/False indicator. 0 or False means the name is an Alternate Name; 1 or True is the Primary Name. Only one of a person’s names should be marked 1 or Primary; any more disappear from RM screens. Much more complex filtering can be done without knowing any SQLite.
 - Let’s change the Primary Name from Mary Haws to Polly Haws. There are shortcuts but here is a procedure that works with all types of fields. Right-click on the Mary Haws IsPrimary cell to open the Text Editor on that field. Replace the “1” with “0” and OK. Note the ungraying of the little button with a checkmark in it situated above the results pane.
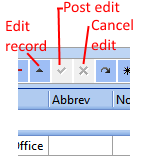
 The change you made has yet to be applied to the database file. Clicking on that “Post edit” button completes the edit as does simply selecting a cell in another row. Now we have no Primary Name and RootsMagic has a Person with only Alternate Names. So now we edit Polly Haws’ IsPrimary field from 0 to 1, Post Edit and, voila, RootsMagic now has Polly Haws as the primary name.
 - As with most Windows programs, there is more than one way to do editing. All the fields of one record can be accessed from an edit screen via the edit record control or by double-clicking on a cell. Experiment with a Play database to get to know the controls and become comfortable with the procedures.
- There are a lot of columns so let’s reduce to the ones we are interested in. Right-click anywhere in the table display and select from the drop-down menu “Select columns”. Uncheck all those that are of no interest and use to your purpose. RecNo is simply the row number of the current result set and has nothing to do with RootsMagic’s Record Number. NameID is not to be touched and is invisible to you in RootsMagic. OwnerID is RootsMagic’s Record Number so check it but do not edit it! After selecting columns, you now have a more compact table to work with as in this screen:
- After editing, when you return to RootsMagic, run its Database Tools: Integrity Check, if not OK then: Rebuild Indexes, repeat.
A SQLite script to setup the screen
If you have not written or run a SQLite script before, here is a simple one that will execute the reorganization of the table display into a more compact form sorted by OwnerID (RIN). Names-Edit_NameTable.sql
- Download it to a place where you can readily find it.
- Click on the SQL tab. Below it, there will appear one or more SQL panes with tabs named SQL1, SQL2, … If this is your first time, there will be one empty pane.
- Either via the Main Menu > SQL or by right-clicking in the SQL pane, select “Load SQL script”, browse to and select the .sql file just downloaded. The SQL pane will now show the contents of the script.
- To execute the script, be sure that you have the desired database selected in the sidebar, then click the “Execute SQL” button. You will see results similar to this:

- You can reorganize the results using the same tools as for the Data display and edit the same way. Had the query involved any other table or contained anything other than the raw data from one table, it would be uneditable.
- You will note that the order of columns is different from the Data display which, by default, shows the order in the NameTable’s definition. That is a consequence of the order set in the SQLite SELECT statement, which you can change by editing the script and re-executing. You can also change the order in either SQL results or Data displays by dragging the column headers left or right. You can add or delete columns in the script, save it and reuse later.
Where to from here?
I hope this proves to be an easy enough entry into a wider understanding of the RootsMagic database and how it can be viewed and manipulated using a free, but good, SQLite manager. For a powerful search tool and to gain some insight into the roles of the various tables that make up a RootsMagic database, look at Search – wayfinding from data tables to RootsMagic screens.


