Copy Fact to Group #update #namedgroup #events

Ever wanted to copy the same fact to a bunch of other people in your database? See the RootsMagic Forum thread Globally add fact to group for some background and an alternative method using GEDCOM. Here’s the braveheart method. See Copy RIN to REFN for a special variant of this query and a procedure that is applicable to both.

CopyFact2Group.sql – rev 2020-05-16 corrected LabelID to LabelValue for the GroupID

-- CopyFact2Group.sql
-- Tom Holden 5 Apr 2011
-- rev 2020-05-16 corrected LabelID to LabelValue for the GroupID
-- ALWAYS BACK UP YOUR DATABASE BEFORE RUNNING A QUERY THAT MODIFIES IT
-- Copies a fact from one person to all persons in a named group
--  - Media is NOT copied but Sources and Note are.
--  - Edit date is not modified from that of the original fact.
-- Requires GroupID and EventID values to be found and entered, each into
--  two queries. The GroupID is the LabelValue of the LabelName corresponding
--  to the name of the Group in the LabelTable table.
--  The EventID is easily found if it is the last fact entered - the EventID
--  of the last row in the table EventTable.
--
-- The first query adds a record to the EventTable for each person with
--  the same fact values as the record copied.
-- The second query adds an identical record to the CitationTable for each source for the
--  copied fact for each added fact. If n sources for the original fact, then the same n
--  sources for the fact are added to each person in the group.
--
-- This query copies the fact/event but not the Sources to the persons in the Named Group
-- CHANGE values of GroupID and EventID to your values
INSERT OR ROLLBACK INTO EventTable (EventType, OwnerType, OwnerID, FamilyID, PlaceID, SiteID, DATE, SortDate,
       IsPrimary, IsPrivate, Proof, STATUS, EditDate, Sentence, Details, Note)
  SELECT EventType, OwnerType, N.OwnerID, FamilyID, PlaceID, SiteID, DATE, SortDate,
       IsPrimary, IsPrivate, Proof, STATUS, EditDate, Sentence, Details, Note
   FROM (SELECT N.OwnerID FROM NameTable N, GroupTable WHERE N.OwnerID >=StartID AND N.OwnerID <= EndID AND GroupID=???) N,
       EventTable E WHERE EventID=???;
 
-- This query copies the Sources for the newly created facts.
-- CHANGE value of C.OwnerID to your EventID value and GroupID to your GroupID
INSERT OR ROLLBACK INTO CitationTable (OwnerType, SourceID, OwnerID, Quality, IsPrivate, Comments, ActualText, RefNumber, Flags, FIELDS)
  SELECT C.OwnerType, C.SourceID, E.EventID, C.Quality, C.IsPrivate, C.Comments, C.ActualText, C.RefNumber, C.Flags, C.FIELDS
    FROM CitationTable C,
     (SELECT EventID FROM EventTable
        WHERE EventID >
         (SELECT MAX(EventID) FROM EventTable) - (SELECT SUM(EndID-StartID+1) FROM GroupTable
           WHERE GroupID=???)) E
    WHERE C.OwnerID=??? AND C.OwnerType=2;

Adding Virtual Columns to an RM4 Table #msaccess #todolist #colorcoding

(This is for the MS Access section of the Wiki. I thought I was putting it there, but it didn’t seem to go there. I guess I’m still figuring out how to work the Wiki. Jerry)

I’m about to describe what I think is a useful approach to some reporting problems that are of interest to me. But I’ll say up front that I’m probably going to abandon this approach because I think I have a better idea moving forward. But in the meantime, I’ll report an what I’ve done so far. Well, I’m going to abandon this useful approach at least in part, but there is at least one case where I will probably continue with this approach.

There are some cases where I want to report on some additional information that is not presently in any of the RM4 tables. So the basic idea is to create a “real” table in MS Access and to think of the “real” MS Access table as if it were a “virtual” SQLite table in the RM4 database. No changes will be made on the SQLite side of the house. I place the additional data on which I want to report in the MS Access table, JOIN the MS Access table with an appropriate SQLite table in the RM4 database, and I can use MS access to report on the JOIN’ed data just fine.

Of course, from the point of view of MS Access, the roles of “real” and “virtual” are just the reverse – the MS Access table is “real” and RM4 SQLite table is “virtual”. And from the point of view of MS Access, you can JOIN a “real” MS Access table with a “virtual” SQLite table in the RM4 database just fine. The idea is to create an MS Access table to contain the additional data, and to be sure that the MS Access table contains a column that can be JOIN’ed with an appropriate RM4 SQLite table.

The first example is an MS Access table that includes a column that has the names of the RM4 colors. I want to be able to display the string “Green” rather than the number 9, for example. And I want to be able sort and filter on the name of the color rather than the number code for the color. I’m sure there is a simple and straightforward SQL way to achieve the required mapping between numbers and colors without having to make a new table, but making a new table is what I know how to do and it is very much in the spirit of how relational databases are usually designed.

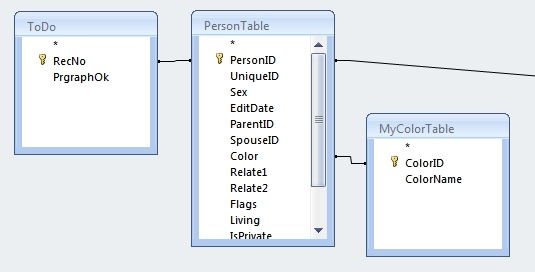
To that end, I created the following MyColorTable and linked it to the RM4 PersonTable, with the required JOIN being between PersonTable.Color and MyColorTable.ColorID.

MyColorTable.jpg MyColorTableJOIN.jpg

The MyColorTable above is the example I plan to continue using moving forward. The following idea is the one for which I think I have a better approach moving forward. For some number of individuals – 17 individuals or 32 individuals or 103 individuals or whatever – I may have five “to do” tasks that I wish to accomplish for each individual. I wish to create a grid with 17 or 32 or 103 or whatever rows, and with five columns. I want to treat the grid as a checklist where I simply check off the appropriate cell for each individual and for each “to do” task when that task is completed for that individual. In my experience, traditional “to do” management software doesn’t work in this very simple and user friendly fashion, including “to do” management that’s available in RM4 itself and “to do” management available in GenSmarts.

So the obvious solution is to create a ToDoTable in MS Access with one column containing the RM4 Record Number for the individuals of interest and the other columns corresponding to the “to do” tasks to be accomplished. The only data that each cell in the “to do” columns has to contain is a 0 or a 1, or a blank or a 1. The 1 is my check mark denoting that the task is complete

This being a relational database application, I went at the problem slightly differently than having a row in my ToDo table for each individual of interest. I don’t really want to constantly be mucking around with entering the RM4 Record Numbers of the 17 or 32 or 103 individuals that are currently of interest. Rather, I want to automate that process. So I really created my ToDo table in MS Access with a row for every individual in my RM4 database. And to allow for future growth of my RM4 database without having to muck around with my ToDo table, I really, really created my ToDo table in MS Access with many more rows rows than there are currently people in my RM4 database. My RM4 database currently has about 58,000 individuals. So I created my ToDo table in MS Access with 100,000 rows. Row 1 of the RecNo column in the ToDo table contains 1, row 2 of the RecNo column contains 2, and so forth through row 100,000 of the RecNo column contains 100,000. The required JOIN is between ToDo.RecNo and PersonTable.PersonID. Some of the rows will never be used, but that’s fine. At the present time, I only have a column for one of my five “to do” tasks. I’ll add the other four “to do” tasks later.

MyColorTableJOIN2.jpg

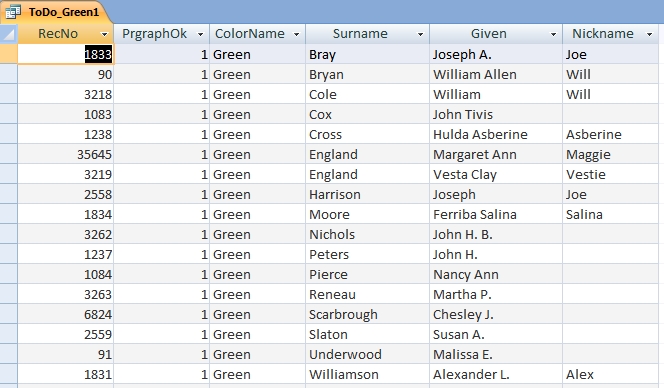
Finally, I linked PersonTable to NameTable so I could display useful information about the individuals, and I filtered by color. So the standard RM4 color coding could be used to select individuals rather than having to muck around with lists of RM4 Record Numbers in my ToDo table, and the final result is as follows.

MyColorTableRPT1.jpg

I’m using “green people” as my filter, individuals color coded as green in RM4. The PrgraphOk task being complete means that for these particular individuals, I have painstakingly edited all fact notes so that paragraphing and white space looks exactly the way I wish for it to look in a narrative report. So in theory, I never have to perform this task again for those individuals. When I first created this MS Access query, the PrgraphOK column was completely blank. I manually replaced each blank with a 1 as I completed my editing and review of the way those individuals appeared in a narrative report. If I continue in this vein, I will gradually color code more people as green in RM4 to create my expanded “to do” list, and if I wish I can filter my MS Access query not to display the rows where PrgraphOk has already been set to 1.

The only thing I don’t like about this approach is that the information in the PrgraphOk column really isn’t stored in RM4, and I might like it to be stored there. There are number of creative places in RM4 where I could store the fact that I have completed my paragraphing review. And having done so, my query could create the PrgraphOk column by testing the data in RM4 rather than by having the data stored in my own ToDo table separate from RM4. I would still have to store the “I completed my paragraphing review” data in RM4 manually when I completed my paragraphing review, but it would keep the data in RM4.

Jerry

Discussions & comments from Wikispaces site


ve3meo

MS Access Section

ve3meo
26 June 2011 00:48:40

There is no section other than what may be implied by navigation guidance. You could edit other MS Access pages to include a link to your page. You could also create a MS Access box in the side menu with links to MS Access pages.

Tom


ve3meo

ve3meo
26 June 2011 12:59:07

Also, tagging the page can assist others searching for relevant stuff.


ve3meo

Comment: the basic idea is to create a “real” table in MS Access‍

ve3meo
03 September 2018 19:06:08

ve3meo Jun 26, 2011

One can add user defined tables in the RootsMagic 4 SQLite3 database using a SQLite manager. So far, I have seen no action from RM4 updates that causes such tables to be modified or deleted. That’s not to say that it could not happen. The nice thing is that these user tables are backed up and restored through RM4’s own procedures and always stay with the database in question. The downside is that they are not directly usable with multiple RM4 databases. But one could create a SQLIte database with MyColorTable and other common tables and an SQLite query can use it with any RM4 database by ATTACH.

Tom
thejerrybryan Jun 26, 2011

Thanks for all the very useful input. I’ve ultimately decided not to add “virtual” tables to RM4 by creating real tables in Access and joining them to RM4. I’ve also ultimately decided not to add any “real” tables to the RM4 database to use in my queries.

It’s been a very useful exercise to learn how to do both, and if it was just me I would probably do one or the other or both. But I would like to think I’m going to be a part of a larger community of users writing SQL against the RM4 database. As such, I would like to be able to write queries that I can post on this Wiki for others to use, and I would like for such queries to “just work”. But they won’t “just work” if they depend on additional tables that nobody else but me has created.

Again, much thanks for all the help.

Jerry

Inline comments


ve3meo

Comment: One can add user defined tables in th…

ve3meo
26 June 2011 13:05:33

One can add user defined tables in the RootsMagic 4 SQLite3 database using a SQLite manager. So far, I have seen no action from RM4 updates that causes such tables to be modified or deleted. That’s not to say that it could not happen. The nice thing is that these user tables are backed up and restored through RM4’s own procedures and always stay with the database in question. The downside is that they are not directly usable with multiple RM4 databases. But one could create a SQLIte database with MyColorTable and other common tables and an SQLite query can use it with any RM4 database by ATTACH.

Tom


thejerrybryan

thejerrybryan
26 June 2011 16:46:42

Thanks for all the very useful input. I’ve ultimately decided not to add “virtual” tables to RM4 by creating real tables in Access and joining them to RM4. I’ve also ultimately decided not to add any “real” tables to the RM4 database to use in my queries.

It’s been a very useful exercise to learn how to do both, and if it was just me I would probably do one or the other or both. But I would like to think I’m going to be a part of a larger community of users writing SQL against the RM4 database. As such, I would like to be able to write queries that I can post on this Wiki for others to use, and I would like for such queries to “just work”. But they won’t “just work” if they depend on additional tables that nobody else but me has created.

Again, much thanks for all the help.

Jerry

DNA Test results list #dna #xml #replace

RootsMagic 4 allows one to add a DNA Test fact to a person and enter the results of two types of test. However, there is no report available for the results making it difficult to verify that all data have been accurately transcribed. The results are stored in the EventTable Details column in XML format, making a direct query of this field difficult to read. These two queries, one for each type of test, produce more easily read results by stripping out much of the XML tagging and formatting the results in list format, tab-delimited for the Y-STR query which has multiple columns.

DNA_mtDNA_locationslist.sql
DNA_Y-STR_markerslist.sql

Sample direct query of a Y-STR DNA Test fact:

PersonDNAtest
Surname, James Gordon<?xml version=”1.0″ encoding=”UTF-8″?>
<dnatest><type>Y-STR</type><laboratory code=”DNAConsultants”>DNA Consultants</laboratory><description>TestDesc</description><id>Test/Kit ID</id><haplogroup confirmed=”true”>Haplogroup</haplogroup><markers><marker code=”DYS385a”><name>DYS385a</name><value>5</value></marker><marker code=”DYS385b”><name>DYS385b</name><value>10.2</value></marker><marker code=”DYS388″><name>DYS388</name><value>6</value></marker><marker code=”DYS389i”><name>DYS389i</name><value>11</value></marker><marker code=”DYS389ii”><name>DYS389ii</name><value>21</value></marker><marker code=”DYS390″><name>DYS390</name><value>17</value></marker><marker code=”DYS391″><name>DYS391</name><value>4</value></marker><marker code=”DYS392″><name>DYS392</name><value>8</value></marker><marker code=”DYS393″><name>DYS393</name><value>6</value></marker><marker code=”DYS19″><name>DYS19</name><value>12-15</value></marker><marker code=”DYS426″><name>DYS426</name><value>6.2</value></marker><marker code=”DYS437″><name>DYS437</name><value>14</value></marker><marker code=”DYS438″><name>DYS438</name><value>6</value></marker><marker code=”DYS439″><name>DYS439</name><value>10</value></marker><marker code=”DYS441″><name>DYS441</name><value>8</value></marker><marker code=”DYS442″><name>DYS442</name><value>13</value></marker><marker code=”DYS444″><name>DYS444</name><value>8</value></marker><marker code=”DYS445″><name>DYS445</name><value>7</value></marker><marker code=”DYS446″><name>DYS446</name><value>8</value></marker><marker code=”DYS447″><name>DYS447</name><value>18</value></marker><marker code=”DYS448″><name>DYS448</name><value>11</value></marker><marker code=”DYS449″><name>DYS449</name><value>23</value></marker><marker code=”DYS452″><name>DYS452</name><value>7</value></marker><marker code=”DYS454″><name>DYS454</name><value>9</value></marker><marker code=”DYS455″><name>DYS455</name><value>4</value></marker><marker code=”DYS456″><name>DYS456</name><value>16</value></marker><marker code=”DYS458″><name>DYS458</name><value>10</value></marker><marker code=”DYS459a”><name>DYS459a</name><value>5</value></marker><marker code=”DYS459b”><name>DYS459b</name><value>2</value></marker><marker code=”DYS460″><name>DYS460</name><value>10.1</value></marker><marker code=”DYS461″><name>DYS461</name><value>11-12</value></marker><marker code=”DYS462″><name>DYS462</name><value>10</value></marker><marker code=”DYS463″><name>DYS463</name><value>5</value></marker><marker code=”DYS464a”><name>DYS464a</name><value>10.3</value></marker><marker code=”DYS464b”><name>DYS464b</name><value>10.1</value></marker><marker code=”DYS464c”><name>DYS464c</name><value>9.3</value></marker><marker code=”DYS464d”><name>DYS464d</name><value>10.3</value></marker><marker code=”GAAT1B07″><name>GGAAT1B07</name><value>14</value></marker><marker code=”YCAIIa”><name>YCAIIa</name><value>16.1</value></marker><marker code=”YCAIIb”><name>YCAIIb</name><value>16.1</value></marker><marker code=”GATAA10″><name>GATA-A10</name><value>14</value></marker><marker code=”DYS635″><name>DYS635</name><value>21-22</value></marker><marker code=”GATAH4″><name>GATA-H4</name><value>12</value></marker><marker code=”DYS465X”><name>DYS464X</name><value>4</value></marker><marker code=”DYS464f”><name>DYS464f</name><value>10.3</value></marker><marker code=”DYS481″><name>DYS481</name><value>22</value></marker><marker code=”DYS485″><name>DYS485</name><value>15</value></marker><marker code=”DYS487″><name>DYS487</name><value>12</value></marker></markers></dnatest>

Above processed by DNA_Y-STR_markerslist query:

PersonDNAtest
Surname, James Gordon“<?xml version=”1.0″ encoding=”UTF-8″?>
<dnatest><type>Y-STR</type><laboratory code=”DNAConsultants”>DNA Consultants</laboratory><description>TestDesc</description><id>Test/Kit ID</id><haplogroup confirmed=”true”>Haplogroup</haplogroup>
<marker code=”DYS385a”> DYS385a 5
<marker code=”DYS385b”> DYS385b 10.2
<marker code=”DYS388″> DYS388 6
<marker code=”DYS389i”> DYS389i 11
<marker code=”DYS389ii”> DYS389ii 21
<marker code=”DYS390″> DYS390 17
<marker code=”DYS391″> DYS391 4
<marker code=”DYS392″> DYS392 8
<marker code=”DYS393″> DYS393 6
<marker code=”DYS19″> DYS19 12-15
<marker code=”DYS426″> DYS426 6.2
<marker code=”DYS437″> DYS437 14
<marker code=”DYS438″> DYS438 6
<marker code=”DYS439″> DYS439 10
<marker code=”DYS441″> DYS441 8
<marker code=”DYS442″> DYS442 13
<marker code=”DYS444″> DYS444 8
<marker code=”DYS445″> DYS445 7
<marker code=”DYS446″> DYS446 8
<marker code=”DYS447″> DYS447 18
<marker code=”DYS448″> DYS448 11
<marker code=”DYS449″> DYS449 23
<marker code=”DYS452″> DYS452 7
<marker code=”DYS454″> DYS454 9
<marker code=”DYS455″> DYS455 4
<marker code=”DYS456″> DYS456 16
<marker code=”DYS458″> DYS458 10
<marker code=”DYS459a”> DYS459a 5
<marker code=”DYS459b”> DYS459b 2
<marker code=”DYS460″> DYS460 10.1
<marker code=”DYS461″> DYS461 11-12
<marker code=”DYS462″> DYS462 10
<marker code=”DYS463″> DYS463 5
<marker code=”DYS464a”> DYS464a 10.3
<marker code=”DYS464b”> DYS464b 10.1
<marker code=”DYS464c”> DYS464c 9.3
<marker code=”DYS464d”> DYS464d 10.3
<marker code=”GAAT1B07″> GGAAT1B07 14
<marker code=”YCAIIa”> YCAIIa 16.1
<marker code=”YCAIIb”> YCAIIb 16.1
<marker code=”GATAA10″> GATA-A10 14
<marker code=”DYS635″> DYS635 21-22
<marker code=”GATAH4″> GATA-H4 12
<marker code=”DYS465X”> DYS464X 4
<marker code=”DYS464f”> DYS464f 10.3
<marker code=”DYS481″> DYS481 22
<marker code=”DYS485″> DYS485 15
<marker code=”DYS487″> DYS487 12
</markers></dnatest>

Extract of above pasted into PSPAD and then into text-formatted cells in Excel 2010:
DNA_Y-STR_markerslist_in_Excel.png

Discussions & comments from Wikispaces site


ve3meo

Use a XML Viewer

ve3meo
03 September 2018 20:36:11

ve3meo Jun 18, 2011

Here’s another way to view the XML data. Copy the Details cell contents to a text file and save it with the extension .XML; then open it with Internet Explorer or some other XML viewer for a color-coded and formatted view that is a big readability improvement.

Inline comments


ve3meo

Comment: Here’s another way to view the XML da…

ve3meo
18 June 2011 19:22:00

Here’s another way to view the XML data. Copy the Details cell contents to a text file and save it with the extension .XML; then open it with Internet Explorer or some other XML viewer for a color-coded and formatted view that is a big readability improvement.

Source Detail View (Parsing XML) #citations #xml

This page was stimulated by a question Jerry Bryan posed in the discussion on the Submit Your Problem page about finding and viewing the value of the Page field for a Free Form template. That led to a series of SQLite queries culminating in this one that I thought warranted a page for further discussion and development. It reports Master Source Names and their citations showing the field names and values entered via RootsMagic 4’s Edit Source window in the green area for Source Detail.

The challenge to viewing these Source Details and other like fields is that they are stored in a single cell for each citation, in hexadecimally coded, XML-like text. In raw form, it looks like this, using SQLiteSpy:

SourceNameFields
Births: Scotland Birth & Baptisms; LDS index (ct NFS, o/l db)Blob

A BLOB is the type name for a field containing hexadecimal vales. One has to convert the UTF-8 code to text using the CAST function to convert this BLOB field, strangely called FIELDS, to a text field we’ll call SourceDetail:

SourceNameSourceDetail
Births: Scotland Birth & Baptisms; LDS index (ct NFS, o/l db)<?xml version=”1.0″ encoding=”UTF-8″?>
<Root><Fields><Field><Name>AccessType</Name><Value/></Field><Field><Name>AccessDate</Name><Value>4 March 2011</Value></Field><Field><Name>ItemOfInterest</Name><Value>Thomas Bowman entry, birth (25 Sep 1864), Dundee`|“|` Thomas Bowman bir. (1864) </Value></Field><Field><Name>SubmitData</Name><Value>C11282-1, Scotland-ODM, Source Film Number: 6035516</Value></Field></Fields></Root>

That’s better but a forest of XML tags obscures the values of interest. The following example code uses the SUBSTR function to cut off the top and tail and nested REPLACE functions to strip out the XML tags and replace with punctuation. To keep the example simple, we won’t go into bringing out the persons, couples, and facts that cite these sources.

-- Citations of all Sources with Source Names and Source Detail fieldnames and values.
SELECT SourceName,
 REPLACE(
  REPLACE(
   REPLACE(
    REPLACE(
     REPLACE(
      REPLACE(PageValue, '</Name>', ': '),
     '<Field><Name>', '; '),
    '</Value>',''),
   '<Value>',''),
  '<Value/>',''),
 '</Field>','')
 AS SourceDetail
FROM
 (
  SELECT S.Name COLLATE NOCASE AS SourceName, SUBSTR(CAST(C.FIELDS AS TEXT),68, LENGTH(CAST(C.FIELDS AS TEXT))-100) AS PageValue
  FROM CitationTable C LEFT JOIN SourceTable S USING (SourceID)
  )
ORDER BY SourceName
;

Here is some sample output:

SourceNameSourceDetail
Births: Scotland Birth & Baptisms; LDS index (ct NFS, o/l db)AccessType: ; AccessDate: 4 March 2011; ItemOfInterest: Thomas Bowman entry, birth (25 Sep 1864), Dundee`|“|` Thomas Bowman bir. (1864) ; SubmitData: C11282-1, Scotland-ODM, Source Film Number: 6035516

Under SourceDetail, you can see the field name (always a one word concatenation) followed by a colon, space, field value and semi-colon, as substituted by the REPLACE() commands. (RM uses “||” to separate a long form from an abbreviation – these were manually quoted above because WikiEditor interprets it in a table as the start of a new cell.)

The same principles could be applied to view the Master Source field names and values or anywhere else RM uses the XML-like format.


Playing around with the Replace characters, I came up with a format that displays rather nicely in both a text editor and in Excel:

Citations-SourceDetailExcel.png
SQLiteSpy adds the quotes around the revised SourceDetail result, probably because of the embedded Carriage Returns. If you copy from SQLiteSpy and paste directly to Excel, you lose the control codes. Instead I paste to PSPad (Notepad should also work), copy from there to Excel, and then invoke its Text Import Wizard to delimit on Tabs with ” as text qualifier. The Text Import Wizard is not available for a direct paste to Excel from SQLiteSpy.

Here’s the revised query:

-- Source Names and Source Detail fieldnames and values for Citations of all Sources, in a columnar style
SELECT SourceName||CAST (X'0D' AS TEXT) AS SourceName,
 REPLACE(
  REPLACE(
   REPLACE(
    REPLACE(
     REPLACE(
      REPLACE(PageValue, '</Name>', CAST (X'09' AS TEXT)),
     '<Field><Name>', CAST (X'09' AS TEXT)),
    '</Value>',''),
   '<Value>',''),
  '<Value/>',''),
 '</Field>',CAST (X'0D' AS TEXT))
 AS SourceDetail
FROM
 (
  SELECT S.Name COLLATE NOCASE AS SourceName, SUBSTR(CAST(C.FIELDS AS TEXT),55, LENGTH(CAST(C.FIELDS AS TEXT))-87) AS PageValue
  FROM CitationTable C LEFT JOIN SourceTable S USING (SourceID)
  )
ORDER BY SourceName
;

I tried this query with three other current versions of software:

  1. SQLite Developer 3.8.3.496: results visible on screen, not as nice as SQLiteSpy; can directly copy/paste to Excel (no added quotes) and invoke Text Import Wizard, thus saving the intermediate paste/copy needed by Spy but first SourceDetail field is preceded with two tabs instead of one as programmed causing it to start in third column while all subsequent ones start in the intended second column. Simply changing the SUBSTR parameters from 55 to 68 and -87 to -100 solves that problem. So I prefer Spy for direct viewing of results – selecting a cell of results shows the full formatted result in the bottom-most window; no such window exists in Developer – the cell expands to the full width but the data is displayed as one row. I prefer Developer for the quality and efficiency of its export to Excel and a text editor (no added quotes and steps).
  2. SQLite2009Pro 3.7.6.3: results in SourceDetail column not visible on screen and improperly exported to Excel.
  3. SQLiteStudio 2.0.12: results in SourceDetail column not visible on screen and improperly exported to Excel.
  4. SQLite Expert Personal 3.3.28.2158: best on-screen display of results; copy/paste to Excel allows invoking Text Import Wizard, required to preserve tab and carriage returns but one tab seems to be lost. Perhaps query can be tuned.

MS Access Engine – Using EXCEL #msaccess #msexcel #charts #filters

Microsoft Excel is a great tool for filtering/sorting/reporting on data in a Grid format. It also provides additional features such as various sorts of in-built graphs based on the data you are using as well as providing, for more advanced users, in-built calculation functions (formulas) that can be used to manipulate the data.

Naturally, as a Microsoft product it provides in-built connectivity to Microsoft Access databases.

If you have set up the links shown in the topics in this wiki concerning MS Access Engine and MS Access Engine – Event Query then you will now have the ability to look at, sort, filter, graph, manipulate data from your RM database from within Excel.

I am using Excel 2007 – so my screen shots reflect this. However, connectivity to MS Access has existed in Excel for many versions so you should be able to achieve the same/similar results from earlier versions of Excel – although the menus and screen layouts may be slightly different.

Firstly – we should remember that we are not directly connecting to our live RM data – we are using the Access database engine as a link through to the real data within the RM database.

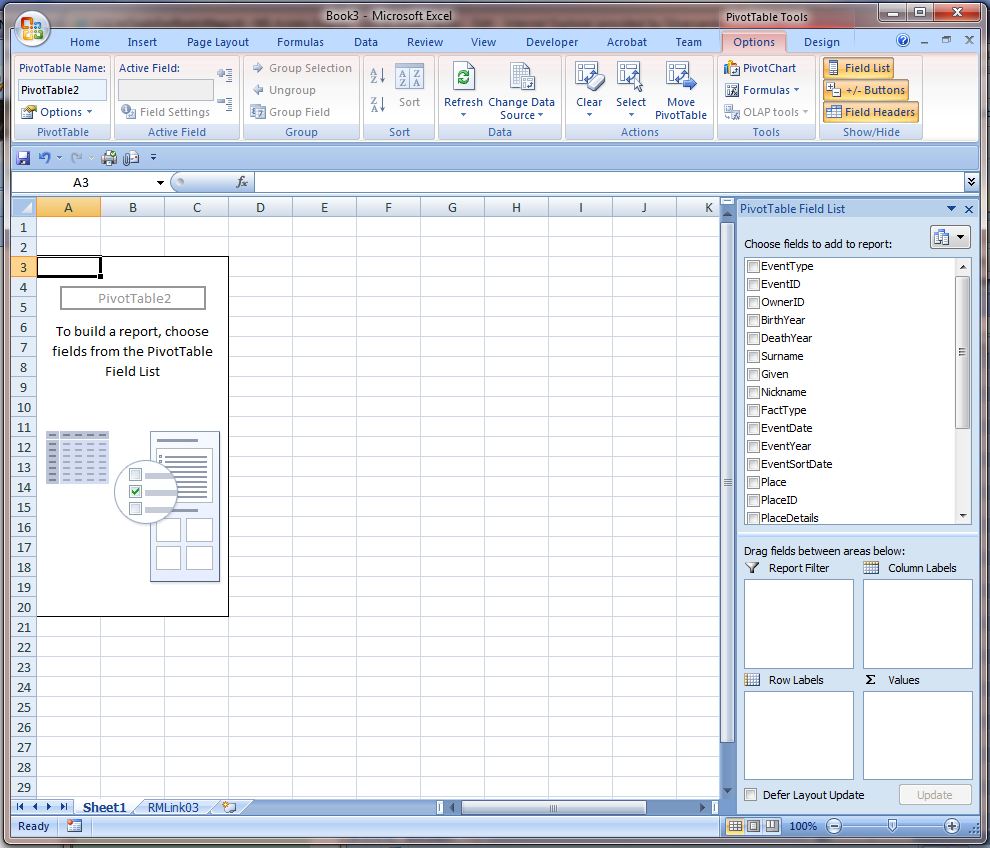
Secondly – there is more than one way to connect to the Access engine from within Excel. One way is to click on the Data tab, select the “From Other Sources” drop down and click on “From Microsoft Query”. This will give you a list of your ODBC sources, inclusing the one you set up when you downloaded and implemented the ODBC driver. If you use this route you will see all the RM Tables which you can open as required. However, you will have the same limitations as were outlined in the other articles – you will not be able to select or sort on all fields.

The easiest wat to get to the data is to just open the Access database you created in following the instructions in the “MS Access Engine – Event Query” wike.

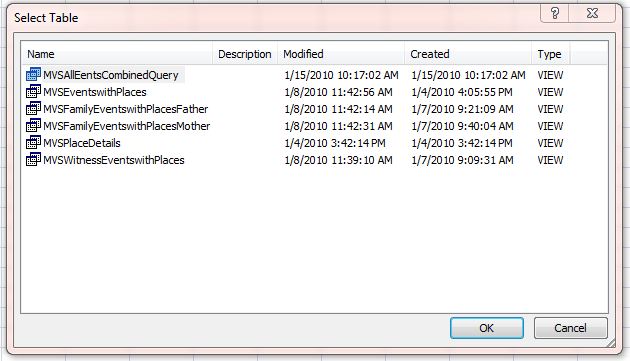
Go to File Open, make sure you are seeing the Access files (not just the Excel work book files, which is the default) and find your Access databse and open it. You will then be shown a screen listing the Queries you set up within the Access database:

AACapture.JPG

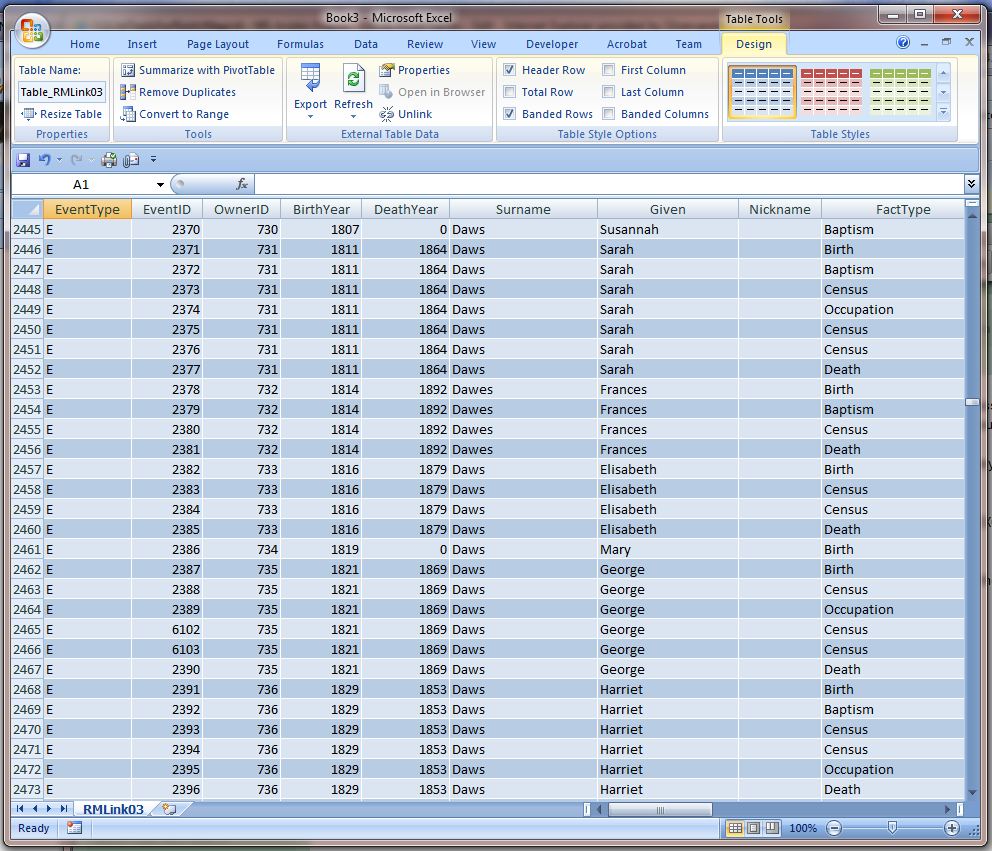
If you select the MVSEventsCombinedQuery it will bring all the Events on your RM database up for display in EXCEL. This may take a moment or two – as Excel seems to read all the events in before populating the Grid. On my PC (quite fast) it takes about 12seconds to read in and display a total of 7500 rows:

ABCapture.JPG

Once this has been done you can use the usual features within Excel to sort / filter. In the example below I have set a filter on “Census” record types only and selected the Surname of “Waller” only. I have also hidden columns I do not wish to display. These enquiries are quick to do and instant to update onscreen.

ADCapture.JPG

WARNING. Do not UPDATE any data unless you are confident you understand what you are changing will not affect the operation of RM.

Prev: MS Access Engine | MS Access Engine – Event Query Next: MS Access Engine – Excel Pivot Tables | MS Access Engine – The BLOB Fields


Discussions & comments from Wikispaces site


ve3meo

Nice!

ve3meo
12 February 2010 14:52:15

I wish I had MS Office Pro….

Questions about RM4 Tables #requestforhelp #datadefinitions #msaccess

I followed your instructions and was able to link to my MSAccess database – but all the files are read-only. Any tips on what might be causing that behavior, rather than them being read/write as your instructions note?

Do you have details on the way the indices join between the tables?

Do you have an explanation about how dates are being stored, and how to turn them into something that is easy to read?

Discussions & comments from Wikispaces site


ve3meo

Write using MSAccess

ve3meo
14 April 2011 19:20:35

This question would be better posed to the MS Access page Discussion. Short answer is that Mark never indicated that he was writing to the RootsMagic database via MS Access, only that he was viewing and reporting. He also expressly warned against modifying data because of unpredictable consequences. As it turns out, there are but a handful of tables that we can modify outside RootsMagic; the others use a secret collation sequence RMNOCASE. There is more on that on the Search & Replace page.


ve3meo

Date storage and interpretation

ve3meo
14 April 2011 19:22:42

Question best posed to the Data Definitions page and pretty well answered on the Date Decoder page and pages linked therefrom.


ve3meo

the way the indices join between the tables?

ve3meo
14 April 2011 19:29:48

Question best posed to the Table Summaries page or to the Data Definitions page.

Tables are not joined by indexes. They are joined by the SQL query that you define or MS Access and SQLODBC create from your MS Access form. The SQLite query optimiser chooses the appropriate pre-existing indexes to use or creates temporary auto-indexes in order to execute the query efficiently.

Backup Media with Database – 7Zip

The following was written in 2011 and RM Inc did rise to the challenge and produced a Backup option that includes media. However, it does two things that some people do not like if they are forced to restore from that backup:

  1. Their carefully developed folder structure for media is collapsed into one media folder underneath the restored database.
  2. Their carefully named media items are renamed in the backup file to a hexadecimal string which must be a hash of the original name. While a successful RM Restore will both extract and unhash the name, using an independent unzip utility will not thus breaking all links between the database and the restored media items.

The procedure described below avoids those two outcomes by preserving paths and filenames in the backup file.

2011 Text

Not everyone wants to pay for an archive utility as much or more than the price of RootsMagic alone, especially when RootsMagic already includes an archiving engine that, with a few tweaks, could do the job. So here is a full database + media procedure that uses a free backup program, 7-Zip AND produces a .rmgb archive/backup file containing both a RootsMagic database and the media files it uses. And the really good news is that the RootsMagic Restore function will unpack the archive to a folder where the media will be in the same relative folders as they were in at the time of archiving. If this target folder path is different from the path of the original database folder, all that’s needed to correct the now erroneous media links in the database is to use RM’s Search & Replace on Multimedia filenames. So c’mon RM! It should be a trivial task to add a full backup feature to the File menu…

The Zip encoder RM4-7 uses for Backup may not be able to handle a large database with many media files – another reason to use outboard procedures until its limitations are lifted. See this article in Wikipedia on the early Zip limits.

If you have not done so, read the original page Backup Media with Database – RAR to find out about setting up the shortcut and placement of files.

This is the batch procedure to be called by the shortcut:
RMfullbackup7zip.bat
RMfullbackup7zip.bat.bak (.bak extension added because of some systems’ security that blocks .bat)

Here is the script:

@ECHO OFF
REM RMfullbackup7zip.bat
REM RMfullbackup.bat by Tom Holden 2011-02-02
REM Rev 2011-03-20: uses free 7-Zip utility to create a .rmgb backup compatible with RootsMagic Restore function
REM Backs up a RootsMagic database file and all the media files referenced by it to one, compressed ZIP type file.

REM Command syntax: RMfullbackup.bat <databasename>
REM This batch file should be in the same folder as the database and expects a Backups folder immediately below it.
REM All media files must be in subsidiary folders below the database folder or in the same folder. If not, then
REM the SET variables must be revised so that the contentPath is common to the database and media paths. 
REM Close the database file from RootsMagic before running.

REM The first backup can take considerable time, depending on the total of the file sizes.
REM To save time on subsequent backups, RMfullbackup merely updates the backup file for those files added, changed or deleted.
REM Install the SQLite3 command line version in the same directory as the RMGC database file(s)
REM  OR set a system PATH to where sqlite3.exe is located
REM  OR prepend the path to sqlite3.exe in the command below.
REM Likewise for 7z.exe
REM Under the RM Data folder, create a folder Backups; if a different path is to be used, edit the command line below.

REM The backup file will be written to the Backups folder and will have the name <databasename>_fullbackup.rmgb
REM A log will also be written to the Backups folder with the name <databasename>_fullback.rmgb.log

REM ***set variables
SET archiver=C:\Program Files\7-Zip\7z.exe
SET contentPath=.\
SET list=.\Backups\backup.lst
SET archive=Backups\%1_fullbackup.rmgb

REM ***run sqlite query to get list of media files to be backed up 
sqlite3.exe %1.rmgc "SELECT DISTINCT trim(MediaFile) from MultiMediaTable;" > "%list%"

REM ***change directory to the root path common to both the database and media files.
cd /d "%contentPath%"

REM backup media files listed by query followed by the database file
"%archiver%" u -tzip "%archive%" @"%list%" %1.rmgc -r > "%archive%.log"

PAUSE
END

LifeLines #places #placedetails #events #lifelines

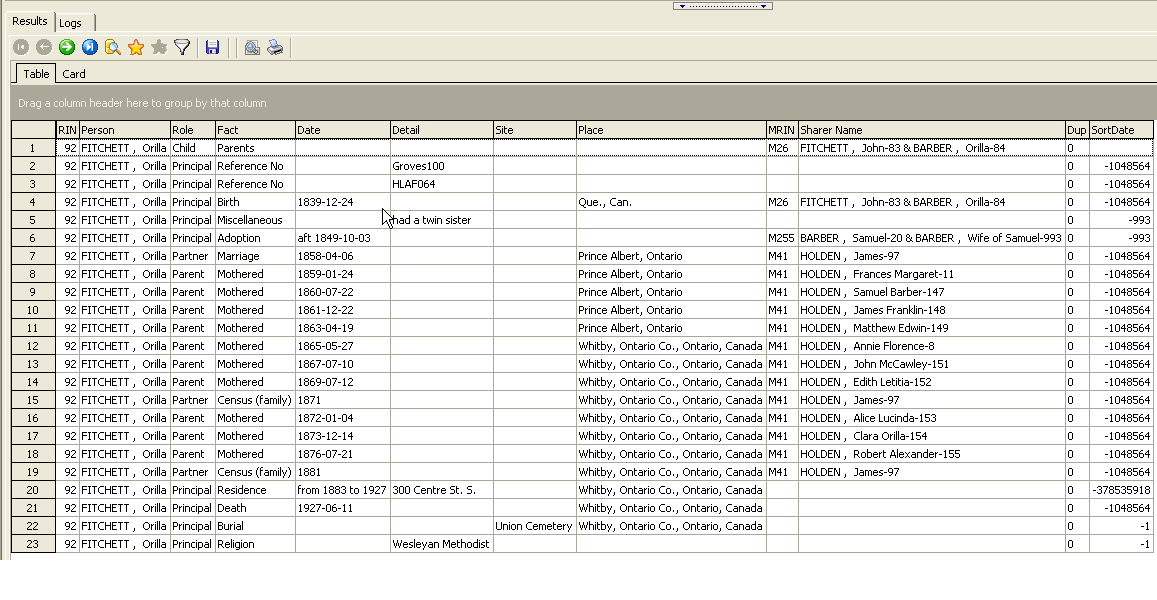
The LifeLines query lists all events for all persons whether in a database tree or not, including shared facts, date, fact detail, site and place, MRIN, other parties, duplication indicator and IsPrivate flag (new!). Sorted by RIN and Sort Date. With the right SQLite manager, can filter results for one person. It’s a successor to AllFacts4Persons12 incorporating structural changes so that the code for date processing is not repeated in every SELECT and one SELECT in particular accomplishes much more than in the earlier query. It’s fast – it produced some 465,000 rows against a database of 155,000 persons in 88s.

LifeLines_Results.png
Sample result displayed by SQLite Developer

The query is provided in two versions:
LifeLines-OO.sql is compatible with many versions of SQLite managers and can only provide results for all persons. Usable with OpenOffice Base (hence the OO suffix).
LifeLines-RINparm.sql is compatible with fewer versions but, with SQLite Expert and some others, has an input parameter to filter results on one RIN. Other managers skip the input parameter and produce the whole result set or raise an error.

LifeLines_Parameter_Input.png
The only difference between the two queries is the WHERE clause in this image showing the RIN input parameter as displayed by SQLite Developer. Entering a blank will return all results.

Date Decoder #date

Decodes most of the possible formats found in RM4 Date fields of the form Da+nnnnnnnn.x+nnnnnnnn.x .
Does not decode Quaker dates nor will it format in any way other than yyyy-mm-dd.
Queries a sample database containing some example dates; this database also contains the query as a VIEW.
The query could be adapted to integrate with a broader query of a RM4 database by renaming the field reference.
It is a large and complex procedure that would be better suited to being programmed as a function in a custom extension of sqlite or in a calling program.
Download query: DateDecoder.sql
Download example database: RMDateFormats.db3
A fuller interpretation of the Date format has been prepared by romermb and can be found on the Dates sheet of the OpenCalc workbook RootsMagic4DataDefs.ods and summarised on the page Date Formats.

Download wPDF300A.DLL #pdfgenerator

RootsMagic 4 updates in the 4.0.9.x series to 4.0.9.3 should install this file in the RootsMagic 4 program directory. For some reason, some installations fail to do so. The result is that reports cannot be saved to PDF format and an error message indicates that the file cannot be found. Downloading this file to the RootsMagic 4 program directory should resolve this problem.

Download: wPDF300A.dll or wPDF300A.dll.bak (Remove .bak extension after d/l)

16 June 2010: It appears that the 4.0.9.3 installer was modified without change in the RootsMagic 4 version number at least once, with at least one variant failing to include this file. Downloading the current installer from the RootsMagic website and reinstalling will include the PDF generator. Because the version number did not change, the Check for Updates menu item will not trigger an update if you already have 4.0.9.3 installed from the miscreant variant.